Drawing With Fire and More Creative Wood Burning Projects
 |
| Personalized Wood Burned Kitchen Utensils Set with Holder |
I told you all in a previous post that I recently warmed up my old wood burning pen and started making some projects and I was very glad that I did so. It's even more fun and rewarding than this gal had remembered it being years ago. I checked out the website here for Walnut Hollow, the company who produced the tool (pen and points) set I purchased years ago to see what else was available. When I saw this set of letters, my mind started to spin with ideas for things to do with it. When possible, I try to support the businesses in our area when possible so I checked at our local Hobby Lobby and was tickled to find they carried the set, though it cost a bit more than the online price. It has already been put to good use,as can be seen from the below picture.
 |
| HotStamps for Use with Walnut Hollow Hot Tools |
I purchased some well-made and sturdy wooden (bamboo) kitchen utensil sets for some family and friends who all enjoy cooking and baking. I then got to work with my hot pen, points and HotStamps to pretty up these already nice wooden pieces and make them more special and personal Christmas gifts. To spiff up the bamboo utensils, I used the same basic procedure as employed in my previous post about how I monogrammed a set of three cutting boards for my best friend.
Note: Some light sanding was done on each item used before placing the design and beginning the burn. This should always be done to help obtain a more even burn. However, wood can be unpredictable and the process is, most assuredly, not an exact science! I believe this aspect, as with most crafts, is one of the things that makes each piece unique and different.
First, I designed a set of the bamboo utensils for the same friend I made the cutting boards for, using the HotStamps Alphabet set to "brand" the initial of her last name into each piece of the set. To create the design for the sprigs of evergreen (some might think rosemary), I used an ordinary pencil to freehand the design. Any desired graphic could be transferred on by using tracing sheets similar to the type I used to fashion the monograms on the cutting boards featured in my above referenced previous post. They are attached the same way as any of the other points and attachments used with the pyrography/wood burning pen and are simply screwed right into the tip. A pair of pliers to tighten and untighten any points and attachments when the gun and/or points are being used and (obviously) very hot is a must!
Note: I wrote some notes at the end of this post about using the HotStamps and other wood burning points used with the pyrography pen.
I used the cone point from my set of points to burn the sprigs below the initial cap. This is the same point I used to inscribe the monograms on the cutting boards in the other post. The cone point is the point on the far left in this photo of the different points in the set:
 |
| Set of Points Used with Wood Burning Pen |
The HotStamps Alphabets were used for applying the letter "B" on to each utensil in the set. There is no photo of the utensils before applying the design (got to get better at doing that). However, pictured here is the personalized version of the set!
 |
| Personalized Wooden Kitchen Utensils |
They will make a much bolder statement on my friends kitchen counter now!
For another good friend, who also appreciates things that are hand crafted and/or hand embellished.
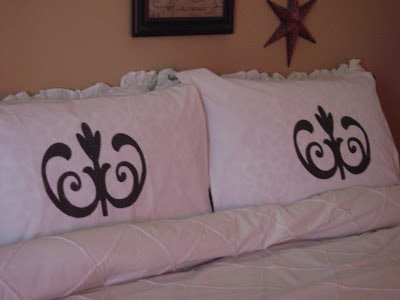
She spends a lot of time in the kitchen, so I knew she would enjoy a set of the utensils too. For her, I also personalized a wooden holder to corral her utensils. Here is a photo of the personalized container holding her own special cooking utensils!
 |
| Set of Wooden Utensils and Storage Container Personalized by Wood Burning Technique |
For the above set, I designed the initial caps and graphic using a design program I purchased a long time ago. Here, again is the back link to that post. Just as I did for the cutting boards featured in that post, I picked the letter, an "H" from available fonts for both the utensils and the storage box, as well. The scroll design on the box is a graphic from the program. As in the previous post, I enlarged the "H" a bit for the design applied to the box and I worked to obtain a nice perspective for the scroll work below the initial cap. My program works well for centering up and grouping designs on paper. When a paper graphic is used over transfer paper, there is no need to reverse the design.
For the cooking utensils, as stated, I decreased the size of the initial cap "H." The point is attached for the initials and scroll work was, once again, the cone point.
Now, for the design on the utensil handles that looks somewhat like a flower, I attached the shading point. The shading point is pictured second from the left in the picture of the description of the points below:
 |
| Description of Points Used with the Wood Burning Pen |
The shading point is the very bottom point in the photo taken of my set of points below:
 |
| The Points that I Own and Use with My Wood Burning Pen |
You can tell from the photo above that the shading point is shaped much like a leaf or the petal of a flower, so it works quite well for applying leaf and flower designs in pyrography work. To get different designs, it can be turned in different directions and positioned with the point facing inward or outward to get the desired effect. Maybe, I will make a future post to better illustrate how the points can be utilized.
The other project featured here is three sets of the same five piece utensils sets. I designed these for members of my family and used my set of HotStamps capital letter Alphabets and some more free-hand evergreen sprigs designs to embellish the handles. Again, I used a sharp pencil to freehand the sprigs and the cone point to burn over the pencil markings. Here are the three sets of bamboo utensils, stacked one upon the other after I finished burning and erasing pencil drawing marks!
 |
| Personalized Wood Burned Utensils Sets |
Some Helpful Tips for Using HotStamps and Other Burning Points: Using the HotStamps meant that there was no need to use the computer to make the designs. I did not take any pictures of how the HotStamps attachments are used. You can see from the above picture of my set of HotStamps Alphabets, the letters are all reversed. That is because when screwed onto the tip of the wood burning pen they are facing down on the wood facing the proper direction. The main thing is to make certain that they are going to burn where desired. In the case of the utensils, my goal was to position each initial as centered as closely as possible to the spot I wanted to burn it on to the wood. The HotStamps are used much like branding irons are used. The pen, with alphabet attached to its tip, is held in straight up position with point resting on the spot to be burned or "branded." I would recommend always doing a good deal of practicing on scrap wood with each tip before beginning to use it!
I favor the cone point for these fine scroll works and thin letters with somewhat thin lines such as on the utensils box and computer designed initials. I like it because it has a finer point that, for me, is easier to control from some of these designs.
A big thank you to all who stop by to check things out here at Mimi Mine blog! I hope you enjoyed my post about drawing with fire and that you might have been inspired to step outside your comfort zone to learn new ways to make great things for yourself and for others!
Please check out these great linky parties that I am linking up with for some wonderful crafting techniques, sewing, do it yourself, decorating , cooking and baking recipes and ideas!
Comments