Tutorial-How to Make a Memory Shirt Quilt, Part Two- Adding Batting, Backing and Quilting the Blocks
 |
| The Assembled Quilt Top Demonstrated by Harriette and Cody |
This post is dedicated to the memory of Elestine West, Harriette's precious mother. She will be spending this coming Sunday, Mother's Day, in heaven. I had the privilege and honor of knowing this beautiful Christian lady. She was a special person and a shining example of what a mother should be. Her health was rapidly failing at the time we began this memory quilt and she passed away in February of this year.
Part One of the tutorial discussed the process of cutting out and assembling the top of the quilt. In today's post, we will be putting together the quilt, batting and backing and applying the quilting stitches to the assembled quilt.
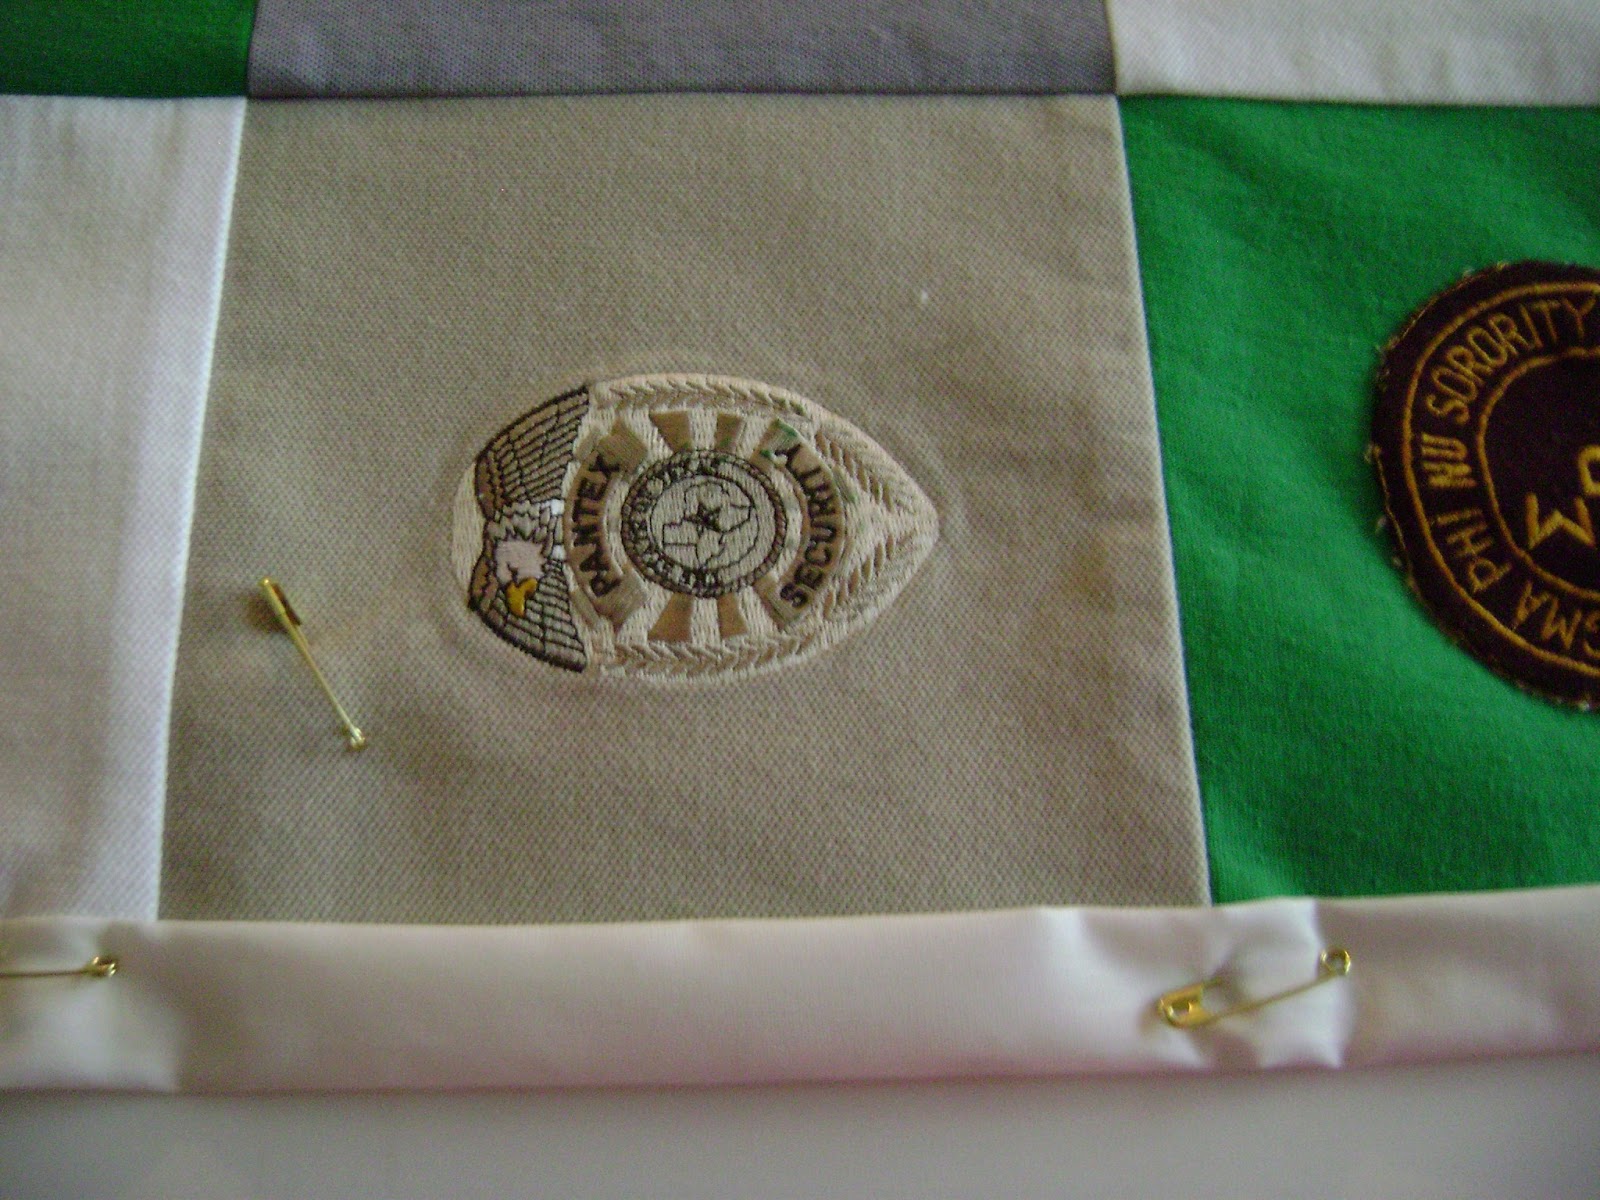
Place some of your safety pins through the two layers to hold the top in place over the batting. After the pins are in place, trim the excess batting from around all sides of the quilt top, as pictured here.

Lay these top two layers of your quilt aside, being careful that the two remain in place, being held together with the safety pins.
We chose to cut the backing of our quilt large enough (3 inches on all sides) to fold to the front to make a self-binding, rather than make individual binding strips.
Place the backing fabric onto the work surface, right side down and touching your work surface. Place the quilt top and batting, facing up, on top of the backing fabric. Measure 3 inches out from the edge of the quilt top, on all sides, making a light marking with a pencil, chalk or sewing marker. Mark all the way around on the backing fabric (I could kick myself for not taking a picture of this step). Carefully, cut the backing fabric on the markings you made.
Materials Required:
- Quilt Batting of Your Choice( this should be at least the size of your finished quilt top).
- Fabric to Use as the Backing for Finished Quilt Top (this should beat least 6 inches longer and 6 inches wider than the dimensions of your finished quilt top to allow you to fold and make the edging around your entire quilt). We used drapery liner which Harriette already had on hand. It worked well because of its width and light, silky texture.
- Scissors
- Thread of Your Color Choice(we used an off-white) to match the back of our quilt and that would also be complimentary to all the colors in the blocks on quilt top.
- Optional: Sewing Machine(unless you will be using hand-stitching to assemble your quilt).
- Even Feed Foot. This is not necessarily a requirement but is a specialty foot for use when sewing hard-to-feed pile, stretch and bonded fabrics. It also makes top-stitching a lot easier.This is what my Even Feed Foot looks like.
- Medium Sized Safety Pins(for Use During the Layering and Sewing Process).
- Straight Pins
 |
| Even Feed Foot for Sewing Machine |
You will want to begin assembly by choosing a spot, which is as dust-free and clean as possible. For our quilt, we used the floor in Harriette's den. Stop laughing, Harriette, your house is certainly clean. This space should be large enough for you to be able to lay out, cut to size and assemble all elements(top, batting and backing) of your quilt. This is essential in keeping your work straight and even as you go.
Applying the Batting to Quilt Top:
Roll out or spread the batting material onto your work surface, smoothing it out as much as possible. Lay the quilt top, right side up, onto the batting material, as illustrated in this photo.
 |
| Quilt Top Placed Face-up on Top of Batting Material |

 |
| Trim Excess Batting Around All Edges of the Quilt Top |
We chose to cut the backing of our quilt large enough (3 inches on all sides) to fold to the front to make a self-binding, rather than make individual binding strips.
Place the backing fabric onto the work surface, right side down and touching your work surface. Place the quilt top and batting, facing up, on top of the backing fabric. Measure 3 inches out from the edge of the quilt top, on all sides, making a light marking with a pencil, chalk or sewing marker. Mark all the way around on the backing fabric (I could kick myself for not taking a picture of this step). Carefully, cut the backing fabric on the markings you made.
Center the quilt top and batting(quilt top with right side up) onto the backing fabric. Now, remember to center your top so that you will be leaving an excess of 3 inches around the quilt, on all sides. Once the top is centered, you can remove each safety pin and replace it, going through all three layers of the quilt. You have created a sort of "quilt "sandwich." Add more safety pins, here and there, as needed. You want these layers to stay put as you start to fold over the backing fabric and as you start to sew around to form the "frame" or binding for the quilt.
Making the Quilt Binding:
Starting at one "side " edge of the quilt, fold the backing forward toward the top of the quilt. You will turn up about 1-1/2 inches, then turn up 1-1/2 inches again, so that it will be flat along the top edge of the quilt. Pin in place. You will repeat this procedure on the opposite "side" of the quilt. Repeat the pinning and folding process of the backing fabric on the other two opposite edges (we will call these sides the head and foot edges of the quilt). This forms the binding or frame around the quilt. This is how the edges should look after you fold and pin them to the top of the quilt:
 |
| Fold Up Edge of Backing Fabric 1-1/2 inches(twice) To Form the "Frame" Around the Quilt |
Note here: We did not "miter" the corners of our quilt, but just folded opposite ends, so as to form a nice even corner when the binding process was complete.
Making sure to remove any pins in the path of your needle as you go, begin sewing your binding. Sew very closely to the folded edge. Begin sewing at the corner of one "side" of the quilt and sew a straight seam to the corner at the other end of that side, back-stitching one or two stitches to hold stitching in place. Now, you will sew the binding on the opposite "side" of the quilt, from one corner to the other. To finish the binding you will now sew a seam across the bottom and top edges or sides. When you sew the "sides" first and then the top and bottom, you should end up with a nice, uniform look at corners. This was easier for us, but if you are good at making mitered corners, you can make those, instead.
The following picture is one of the bottom or "foot" of the quilt , as we were sewing the last seam to form the binding around the raw edges of the quilt layers.
 |
| Sewing the Last Seam to Complete the Quilt's "Frame" |
The Quilting Process:
Begin sewing your first seam about 1/4 inch from the edge of the first row of horizontal blocks that make up your quilt top. Begin sewing just below the folded edge of the quilt binding, at the top of the quilt, and continue down the row of blocks, in a straight line, stopping just before reaching the edge of the binding at the bottom end of the quilt. Moving to the next horizontal row at the top of the quilt, start sewing the next line of stitching, taking care not to stitch on top of the binding. Sew a seam along the edge of each horizontal row. If your quilt is large, you will probably have to roll it up under the arm of your sewing machine as you move along your quilt. It took both of us for this step(one to hold the quilt in place and the other to sew the seams). This is a picture of the way it looked as it was rolled and it also shows how the corner of the quilt folded to make a nice corner:
 |
| Quilt Shown as it was Rolled Under the Arm of the Sewing Machine |

 |
| Sew About 1/4 Inch From Edge of Blocks in Both Directions to Make the Quilted Pattern |
The back of the quilt is sometimes my favorite part. I think the back of the quilt we made looked pretty nice when quilting was complete. The back of your finished quilt will look something like this when it is finished.
 |
| Back Side of Quilt After Quilting Process is Complete |
I hope you have been inspired to try your hand at making a shirt quilt. We learned a lot throughout the process and it was so much fun.
To find Part One of the Memory Quilt and to see how to cut and assemble the "top" of this memory quilt, click on the following link http://mimimine.blogspot.com/2013/04/tutorial-how-to-make-memory-shirt-quilt.html.
To find Part One of the Memory Quilt and to see how to cut and assemble the "top" of this memory quilt, click on the following link http://mimimine.blogspot.com/2013/04/tutorial-how-to-make-memory-shirt-quilt.html.


Comments
this is a wonderful work! Thank you for sharing the steps to make it perfect.
Hugs and love
Erika
Have a great weekend!