Painting a Carriage House Lantern Style Light Fixture
The ones I so much admire are often painted black and sport lots of sparkling glass "windows" or panes of glass. Though I adore the style, the retail price for most of these beauties is much more than I care to pay. So, I was keeping an eye out for something that would have the characteristics I had been looking for and still be achievable at a price I was willing to pay.
Some time ago, I was perusing a local thrift store and spied a light fixture that had lots of potential. It was, however, not black but a shiny brass one. It was in very good condition and, at around 22 inches in height, was a perfect size for my family/living room. The fixture had six lovely etched glass "window" panes. Everything in the store that day was half price. Knowing that I could transform this neglected lady from a brassy blond to a dark and sultry brunette with a few good coats of spray paint, I purchased her for only fifteen dollars and brought her home with me. She had to wait for quite some time (about a year, as I recall) before I finally got around to giving her an overhaul.
Afterwards, I am pleased to say it looks exactly as I had envisioned it would! Here are some photos of the finished product as it now hangs in our family room.
 |
| Painted Carriage House Lantern Style Ceiling Light Fixture |
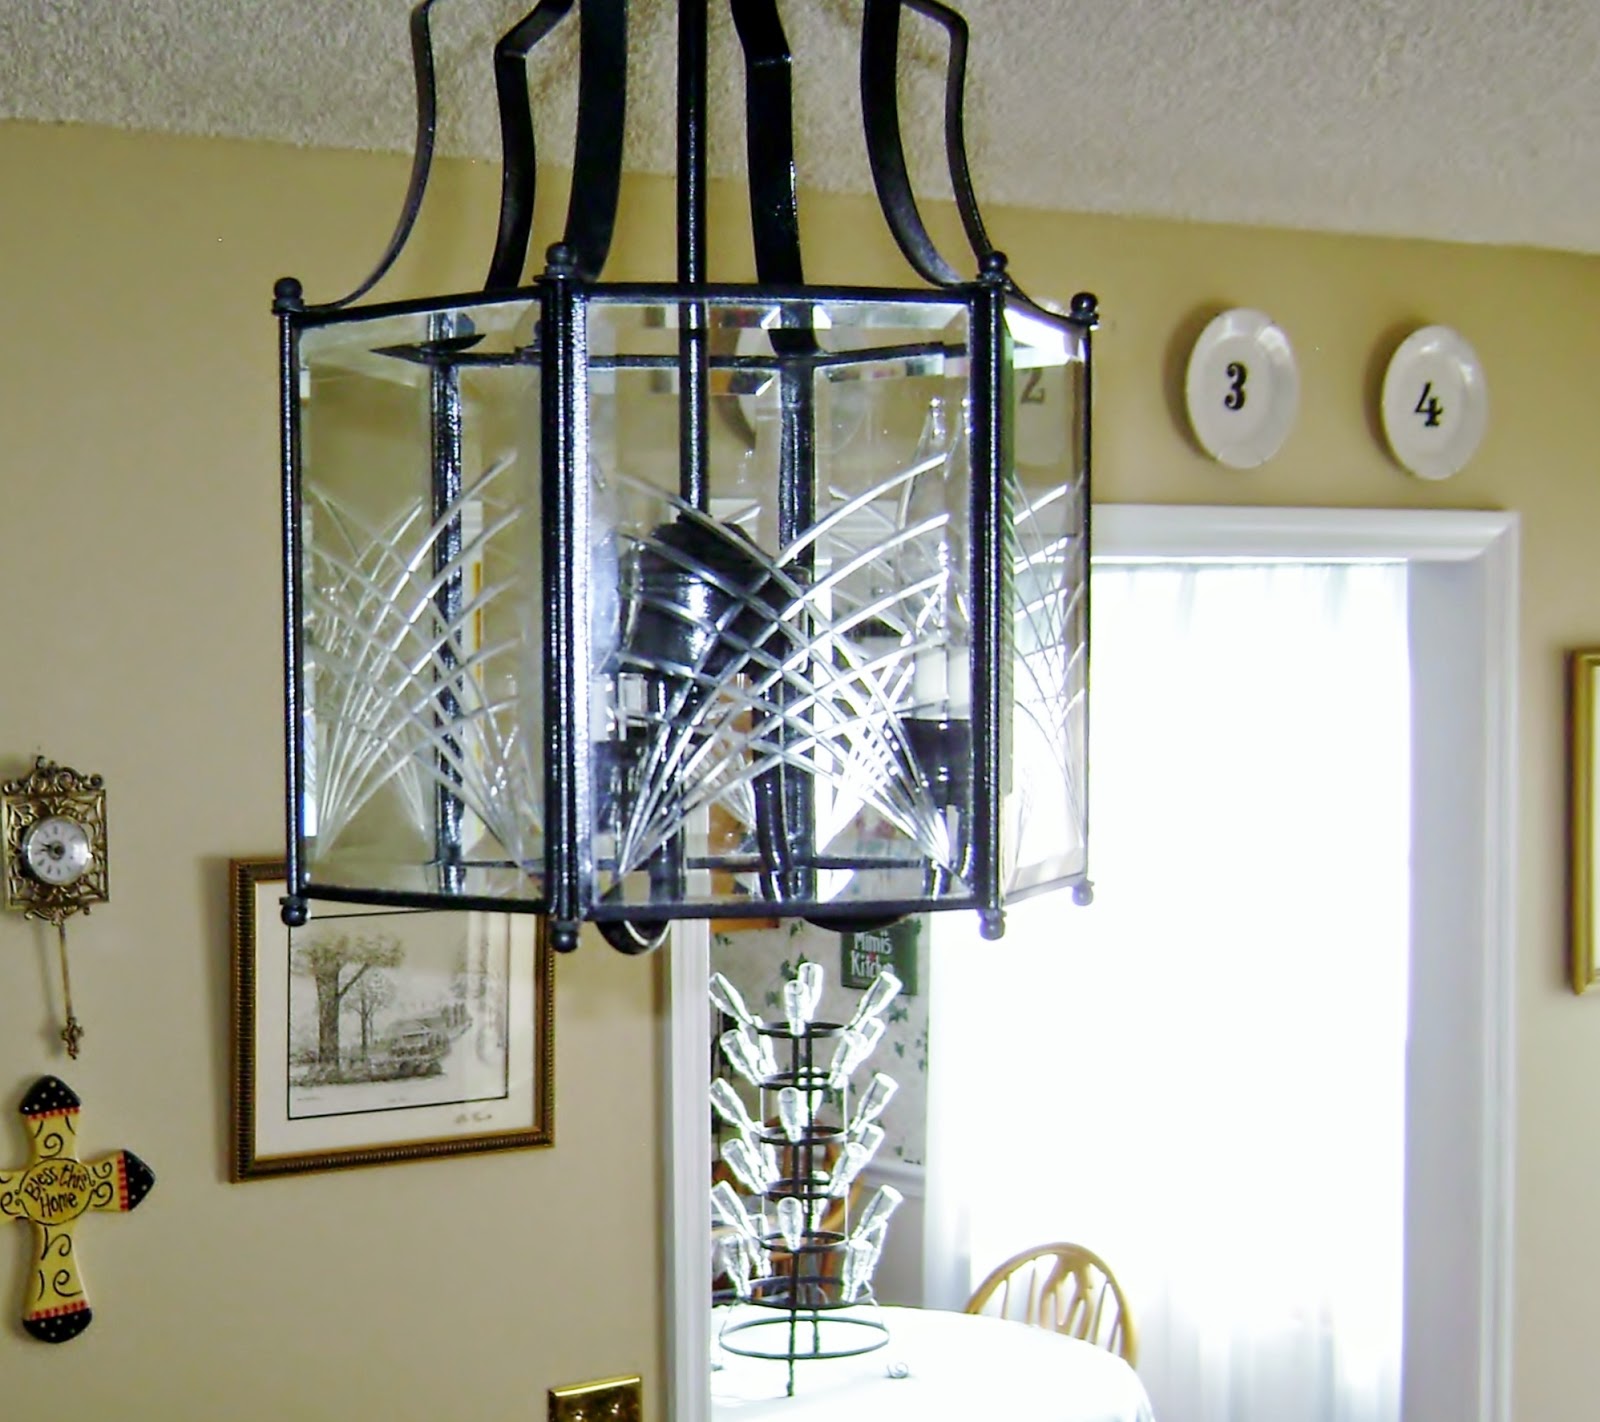 |
| Painted Carriage House Lantern Style Ceiling Light Fixture |
Fixture with lights burning:
 |
| Painted Light Fixture With Lights Burning |
 |
| Close Up of Light Fixture With Lights On |
Here is a picture of the fixture as it looked before I painted it.
 |
| Shiny Brass Carriage House Lantern Style Lamp Before Painting |
I have found that with most projects, preparation is the most time consuming part. This paint project was no exception. The first thing I did was to clean (do not immerse in water)the fixture with a damp, lint-free, cloth and a bit of mild dish detergent. I made sure to get in to all the crevices to remove any dust and dirt that had accumulated. I wiped the fixture with a damp, lint-free, cloth to rinse and used a dry cloth to remove any remaining moisture. I made certain that the fixture was completely dry.
I then unscrewed each of the six small caps on the top of each of the glass window sections. Removing the screw caps allowed me to detach the inside section and top section from the glass portion of the fixture. I cut rectangles of paper the size of the glass panes and used the paper and painter's tape to completely cover the glass sections on the inside and outside of each pane. Painter's tape was also used to wrap around each of the bulb sockets(where the light bulbs screw in). Only the brass was left exposed. This is what it looked like after disassembling the two sections and applying the paper and painter's tape:
 |
| Carriage House Lantern Style Ceiling Light Fixture After Preparing to Receive Paint |
 |
| Process of Spray Painting Carriage House Lantern Style Ceiling Light Fixture |
 |
| Spray Painting Ceiling Light Fixture |
This gal really does look new again! After all was said and done, it was worth all the work of preparation and painting the fixture and I am pleased with how it turned out. It makes me happy when I look at it hanging in our family room!
 |
| Painted Light Fixture |
Just goes to show how something that is no longer wanted by one person can be given new life and bring satisfaction and pleasure to another!


Comments
You did am amazing job, my friend!! Love it !!
Thanks so much for your visits!! I have been so busy running our church flea market but now that is over with and i am so glad it is done!!
Hugs,
Deb
It wouldn't have done for anyone to hear the things my husband and I were saying to each other during the process (ordeal) of installing that light!
I hope your kids are enjoying school and that all is well with you and your family!
Hugs
Angelica