A while back, I told you a little about a special quilt my best friend, Harriette, and I put together for her husband, Larry. I wish I could take credit for the concept and creation of this wonderful quilt, but, alas, I cannot. Yes, I cut squares of fabric and backing, as instructed, and I even sewed a seam or two. Oh, and it was I who took pictures to document the process. I have seen ads on the internet where you can send in your tee-shirts and have them made into quilts, but this particular quilt was altogether the vision of my awesomely talented friend.
Larry has worked for many years in the area of law-enforcement and security. He spent most of the last years of this career working for a security site, where his job took him to many areas of the United States. He accumulated a large collection of shirts from different sites at which he had worked during the time he was employed at the site. The shirts had been packed away and were serving no practical purpose. As the couple was cleaning out their attic a few months ago, they found a box of memorabilia and patches from the days when he was a young Boy Scout, etc. The idea began to come together for her. A quilt would be a beautiful and useful way to remember those days and times of boyhood and career.
The entire process took a couple of months of working together, as we could find the time. I don't want to discourage readers by making this post too long, so I will do another post on how to put the quilt top, batting and back together for the finished product. For sure, there are those of you who are experienced quilters and seamstresses, but I am trying to be as detailed as possible for those of you who have not made quilts before.
This post, then, is dedicated to the process of constructing the top of the quilt.
Materials and Tools You Will Need For Making Your Quilt Top
- Scissors
- Quilting Ruler or Other Straight Ruler
- Thread the Color of Your Choice
- Sewing Machine to Sew Straight Stitches
- Shirts with Embroidered Emblems and/or Patches to Sew onto Fabric Squares
- Light Weight Fusible (Iron-on) Backing
- Cardboard or Other Material to Cut a Template for Quilt Blocks(for those of you who quilt a lot, you might already have transparent quilt templates of the size you want for your squares)
Steps for Assembling Quilt
Measure and cut out a template to use for cutting your shirt patches. You will want this template to be the size you desire each finished quilt block to be, plus one inch larger to allow for 1/2 inch seam allowance. In other words, if you want your finished blocks to be 6x6 inches when sewed together, then cut a template 7x7 inches and this will give you 1/2 inch seam allowance, when you start piecing, for each seam of your square.
 |
| Making Template for Cutting Shirt Patches |
You might want to use the next step to make sure you are going to cut where the emblems will be displayed to best advantage. Cut a piece of waxed paper or other transparent material the same size as the cardboard template. You can see through it for proper placement over the emblems on the shirts, like so:
 |
| Transparent Waxed Paper Template |
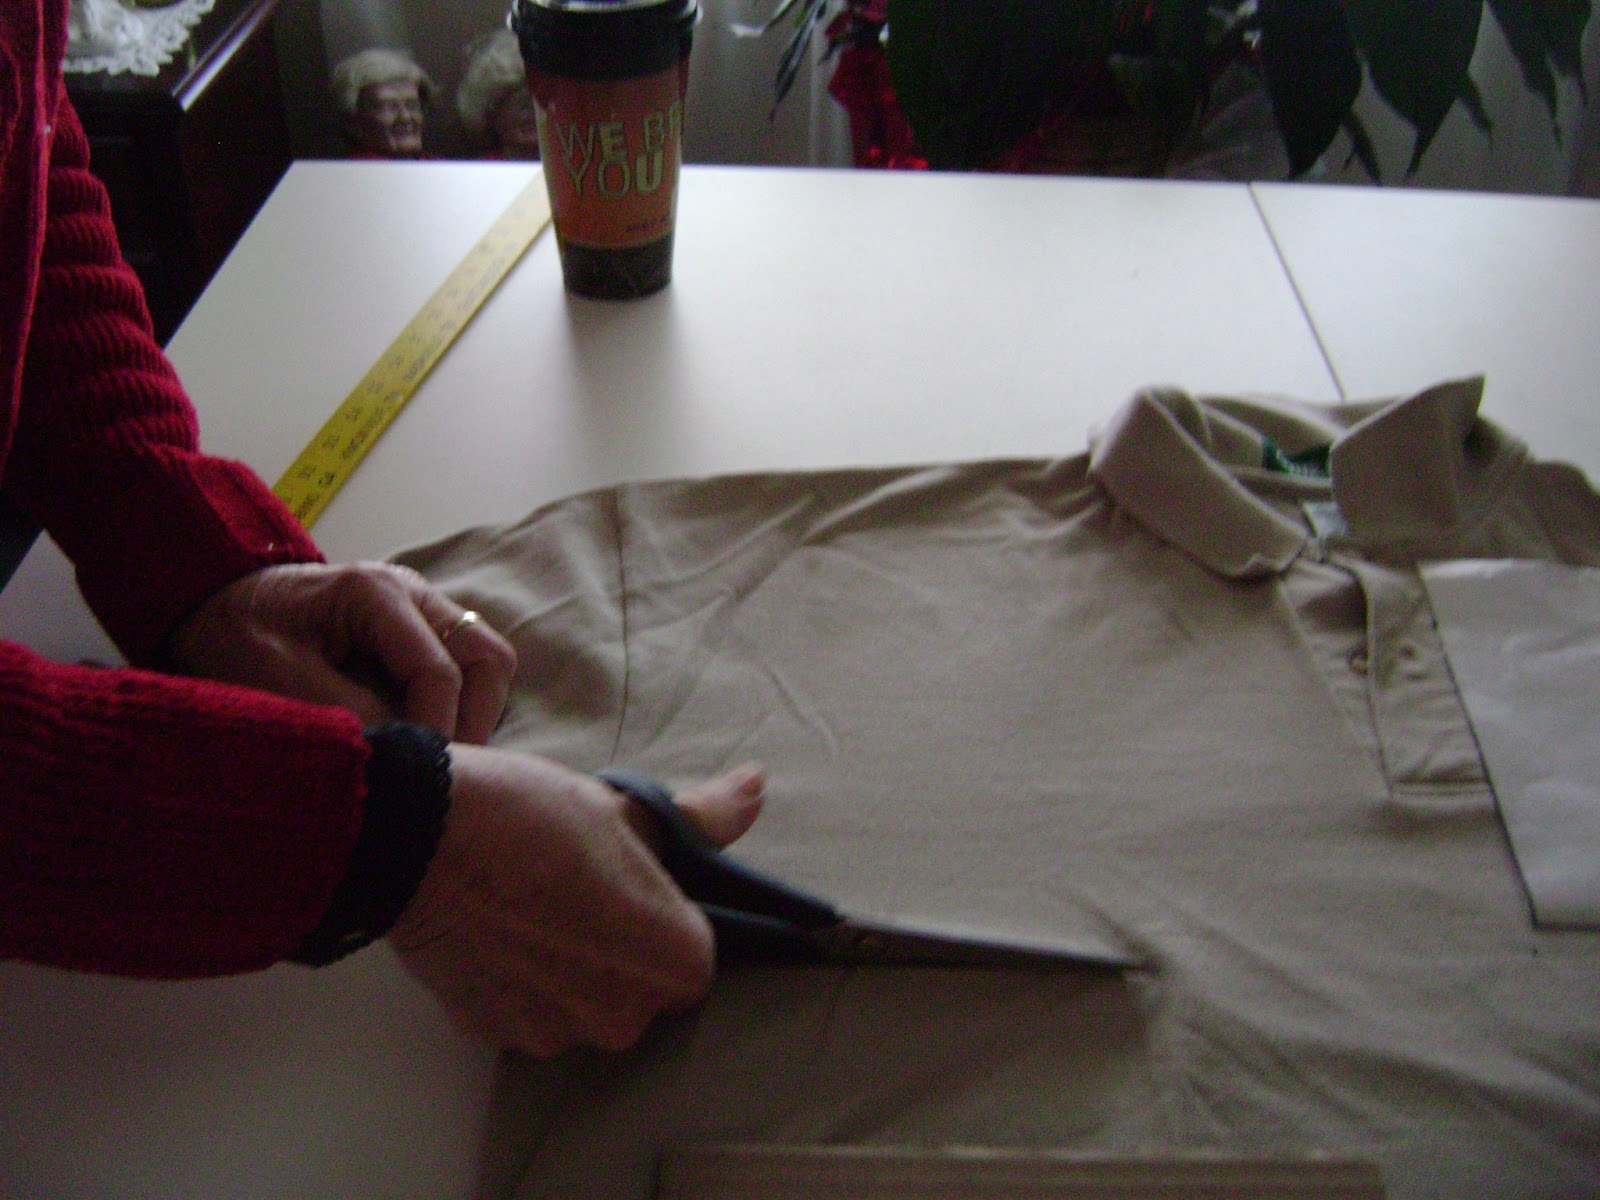
Begin cutting out your shirt emblem squares. At this point, you will be rough-cutting, allowing an inch or so extra over the size of your original template. You will be cutting off any extra fabric later when you use your cardboard template for cutting the squares to size. Note: During this step, you will also want to cut out some extra plain squares from the left-over shirt fabric to use to fill in, as needed, when you lay out and begin to piece your quilt together. Also, if you have loose patches to use, you will need blank squares on which to sew these.
 |
| Cut Out Squares and Extra Plain Squares |
Time to cut your squares of the fusible backing. You will need a square of fusible backing for each fabric square to be used in your quilt. Cut these a little larger than your cardboard template. Any excess will be cut off after the backing is fused to the shirt squares. In other words, you will be laying down your template onto each shirt square after the fusible backing has been applied and cutting through both, to make squares the exact size of your template.
 |
| Cut Out Squares of Light-weight Fusible Backing |
Following the instructions that come with your fusible backing you will now begin to iron the fusible backing to the back(wrong side)of each shirt square.
 |
| Iron Fusible Backing to the Back of Each Shirt Square |
You will now be using the template you made to mark each square of the shirts with fusible backing having been applied. You can use a disappearing marker, pencil or pen of your choice for this step.
 |
Use Template to Mark a Square onto Each Square of Shirt and Fused Backing
|
Cut around each square of backed shirting on the lines you made with your template. I apologize, but I missed getting a picture of that step.
Harriette wanted to add a block with a special message, using her fabulous embroidery machine.
 |
| Message to be Embroidered onto a Square to Personalize the Quilt |
 |
| Message Being Embroidered |
 |
| Harriette Designing Message for a Block on Quilt |
 |
| How the Finished Message Looked |
You will now want to lay out your squares onto a surface large enough to accommodate the entire length and width of the quilt top when arranging the pieces. For this purpose, we used a bed. Make sure that all the designs and/or writing is running in the same direction, so that when your quilt is hung or placed on a bed, the designs can easily be seen and read. Arrange the squares into a pattern which is pleasing to look at. Be sure to place the different colors and designs where they look best. The personalized "message" square looked best in the bottom row on a corner, so that is where we placed it. This picture was taken from the bottom of the quilt, looking toward the top as squares were being placed, with quilt being cross-wise on the bed. We changed the arrangement after we took this picture. We had placed several plain squares together at the bottom and it didn't look right. Hopefully, this gives you some idea of what I am trying to convey.
 |
| Place Squares on Large Surface Like a Bed or the Floor to See How They Will Look |
Beginning with the bottom 2 squares of each vertical row, flip down the second square onto the top of the bottom square(right sides facing) and pin the two together. Open these two squares back up and flip down the 3rd square onto the 2nd square and pin the two together. Flip that one back and you will have 3 pinned together, vertically. Carry on this way until you reach the top of the first vertical row. You will have pinned together one entire vertical row. Use a pencil and write a "1" on the back of the top square of this first row. Now start with the bottom of the next vertical row and pin it together, just as you pinned the first. Now mark that row on the back with the number "2". You see, if you do this with each row as you pin it together you will not have any trouble piecing your quilt in the same manner as you placed the squares.
 |
Pin Each Row Together Vertically
|
Using one-half inch seam allowances and with right sides together, it is now time to start sewing the rows of vertical squares together where you pinned each.
 |
| Sewing Squares Together to Make Vertical Rows |
After you complete sewing the squares together to form the vertical rows, press the seams of the squares on vertical row "1" in a
downward direction. On row "2", press the seams all going in an
upward direction. On row "3", press all seams in a
downward position. Follow through, pressing the seams in each vertical row in the
opposite direction as the one before it. You will now pin vertical row "1" to vertical row "2" and sew the rows together. Make sure the rows of seams are still facing(as when you pressed them) in opposite directions when pinned. Sew vertical row "2" to vertical row "3" and so on and so forth, until all rows are sewed together to form your quilt top. This picture illustrates what two rows will look like when sewed together with seams facing opposite (one seam downward and the next facing upward):
 |
| Seams of Each Vertical Row Are Sewed Together with the Next in an Opposite Direction |
Once you have all vertical rows sewed together, press the whole top again on the reverse side. Note again in the following picture how each row has been sewed in an opposite direction to the previous one. The object here is to not have a bunch of bulky fabric at intersections where seams meet and that the quilt top will be lay much smoother and prettier when finished.
 |
| See Here How Each Row Faces in the Opposite Row From the Next |
Here is a picture of the finished quilt top. Coty thought he needed to be in the picture, too! He is such a cutie and he knows it.
 |
| Finished Quilt "Top" |
As you can see, this quilt is very big. Your quilt can be smaller or bigger. Or, as the gorgeous Marilyn Monroe might have been saying when this famous picture from the movie Seven Year Itch was taken "Whatever blows your skirt up!"
 |
| Marilyn Monroe in Scene from Seven Year Itch |


Comments